Quick Start
Quick Start Guide
Create your first interactive story in just 5 minutes. This guide will walk you through the basics of StoryFlow Editor.
Create Your First Project
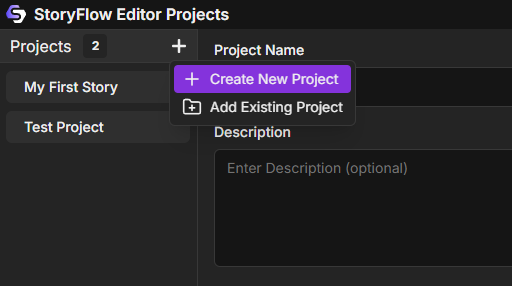
When you launch StoryFlow Editor for the first time, you'll see the Projects Window. This is your central hub for managing all your interactive story projects. Let's create your first project and start building!
- Launch StoryFlow Editor from Steam or your desktop shortcut
- In the Projects Window, click the "Create New Project" button in the top toolbar
- A dialog will appear. Enter a descriptive project name (e.g., "My First Story")
- Choose a save location on your computer where the project files will be stored
- Optional: Check "Initialize Git Repository" if you want version control for your project
- Click "Create" to generate your project
The editor window will open automatically, showing an empty canvas where you'll build your story using nodes. Your project is now saved to disk and will appear in the Projects Window sidebar for easy access.
Tip: Project Organization
Store your projects in a dedicated folder like "Documents/StoryFlow Projects" for easy management. Each project creates its own folder containing a .storyflow file and any associated assets.
Add a Dialogue Node
Now that you have an empty canvas, let's add your first dialogue node. Dialogue nodes are the foundation of your interactive story - they display text to the player and can offer options that branch the narrative in different directions.
To add a dialogue node:
- Right-click anywhere on the canvas to open the node creation menu
- Select Dialogue from the menu
- A new dialogue node will appear on the canvas
- Click on the node to select it and view its properties in the right panel
Configure your dialogue node:
- Title: Optional text for the node header (e.g., "Narrator", "Alice", "Guard")
- Text: The dialogue content the player will see (e.g., "Welcome to StoryFlow! What would you like to do?")
- Options: Add options the player can select by clicking the "+ Add Option" button
- Option Text: Label each option (e.g., "Explore the forest" or "Talk to the merchant")
Try This!
Create a dialogue node with the title "Guide" and the text "Your journey begins here. Which path will you take?" Add two options: "The Mountain Path" and "The Forest Trail".
Connect Nodes
Connections are what make your story interactive. They define how players move from one node to another based on their options. Let's create a simple branching story by connecting multiple dialogue nodes together.
Create a second dialogue node:
- Right-click on the canvas and add another Dialogue node
- Set the title to "Mountain Guide"
- Add text: "The mountain air is crisp and cold. A narrow path winds upward."
- Position this node to the right of your first node for better organization
Connect the nodes:
- On your first dialogue node, find the small circular handle on the right side of each option
- Click and hold on the handle for "The Mountain Path" option
- Drag your mouse to the second dialogue node
- Release when hovering over the second node - it will highlight to show it's ready to connect
- A connection line will appear, showing the story flow
You can connect option outputs to any node's input. Create a third dialogue node for "The Forest Trail" and connect it the same way. Your story is now branching based on player options!
Tip: Organizing Your Nodes
Arrange nodes left-to-right to represent story progression. Keep related branches close together. You can drag nodes around the canvas at any time to reorganize your story visually.
Test Your Story
One of StoryFlow Editor's most powerful features is the built-in Play Window. You can test your interactive story at any time without exporting, making it easy to iterate and refine your narrative as you build.
Launch the Play Window:
- Look for the Play button (▶) in the top toolbar of the editor
- Click it to open the Play Window
- Your story will start from the first node (marked as the Start node)
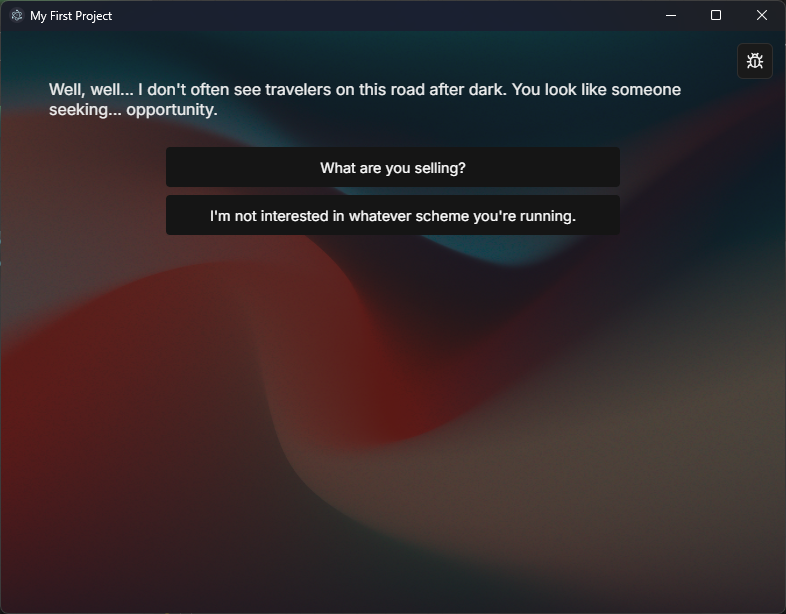
- The Play Window displays your dialogue exactly as players will see it
Test your branching story:
- Read the dialogue text from your first node
- Click on one of the options (e.g., "The Mountain Path")
- The story will progress to the connected node and display its dialogue
- Continue clicking through options to test different story paths
Close the Play Window when you're done testing. You can reopen it anytime to test changes as you build your story. This rapid testing cycle helps you catch flow issues and refine your narrative before exporting.
Success!
You've created and tested your first interactive story! You now understand the core workflow: create nodes, connect them, and test in the Play Window. This is the foundation for building complex, branching narratives.
Next Steps
Now that you've created your first story, explore these topics to expand your skills:
[
Learn About Node Types
Discover all 21 node types including dialogue, variables, logic gates, and control flow.
](https://storyflow-editor.com/docs/node-types/)[
Variables System
Learn how to use variables to create dynamic, responsive narratives.
](https://storyflow-editor.com/docs/variables/)