Overview
Visual Scripting Overview
StoryFlow Editor uses a visual scripting system (also referred to as the node editor) - a powerful no-code interface for building interactive stories. Learn how to navigate and use it effectively.
Visual Scripting Interface
The visual scripting system (also referred to as the node editor) is a workspace where you build interactive stories by connecting nodes together - no programming required. Instead of writing code, you create logic flows, dialogue branches, and complex behaviors by dragging nodes onto a canvas and connecting them visually. The interface uses a resizable multi-panel layout that adapts to your workflow, with dedicated areas for editing, variables, and content management.
Main Interface Components:
- Top Menubar: File operations (Save, Save All, Show in Content Browser) and Help menu
- Center Toolbar: Save, Play/Stop buttons, Settings (theme), and Export options
- File Tabs: Horizontal tabs showing all open files. Drag to reorder, click X to close. Changed files show an amber indicator
- Variables Panel (Left): Lists all boolean and integer variables for the current script. Drag variables to canvas to create Get/Set nodes
- Canvas (Center): The main editing area where you create and connect nodes to build your story flow
- Dialogue Editor (Right): Appears when you double-click a dialogue node. Edit title, text, background image, and options
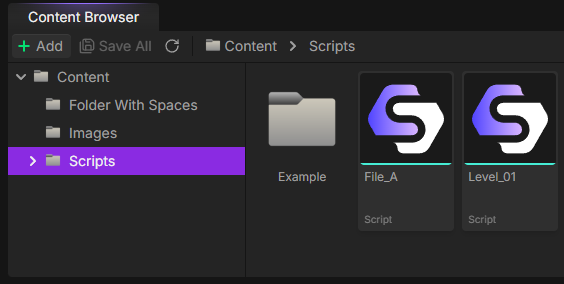
- Content Browser (Bottom): File explorer for your project. Create folders and scripts, drag images to dialogue editor
Resizable Panels
All panels can be resized by dragging the borders between them. The editor remembers your layout preferences. Collapse panels you don't need to maximize your canvas space.

Navigation Controls
The canvas provides smooth navigation controls to help you work with stories of any size. Whether you have 10 nodes or 1,000, these controls make it easy to move around and stay organized.
Canvas Navigation:
- Pan (Move): Click and drag on empty canvas area to move your view around
- Zoom: Use your mouse wheel to zoom in and out. The zoom level is displayed in the top-right corner
- Fit View: Click the fullscreen icon button (top-right) to center your view on the Start node
- Minimap: Enable the minimap via Settings (gear icon, top-right) for a bird's-eye view of your entire story. Click nodes in the minimap to jump to them
Node Selection:
- Select Single Node: Left-click on any node to select it
- Multi-select: Hold Ctrl and click nodes to add them to your selection
- Box Select: Click and drag on empty canvas to draw a selection box around multiple nodes
- Deselect All: Click on empty canvas area
Canvas Controls (Top-Right):
- Zoom Indicator: Shows current zoom percentage (e.g., "100%")
- Fit View Button: Centers view on your Start node
- Settings Button: Toggle minimap visibility
Tip: Viewport Memory
The editor remembers your zoom level and pan position for each script file. When you switch between files using the tabs, your viewport position is automatically restored.
Adding Nodes
Visual scripting in StoryFlow is built around adding and connecting nodes. Each node represents a specific action or logic operation, and connecting them together creates your story's behavior. StoryFlow Editor provides two methods for creating nodes: the context menu for browsing all available node types, and drag-and-drop from the Variables panel for creating variable nodes.
Using the Context Menu:
- Right-click on any empty area of the canvas
- The Node Creation Menu appears with all available node types
- Browse through categories or use the search bar at the top to filter nodes
- Click on a node type to create it at the cursor position
Node Categories in the Menu:
- Flow Control: Dialogue, Run Script, Branch, End, Comment
- Boolean Operations: Not, And, Or (yellow indicator)
- Integer Operations: Greater Than, Less Than, Plus, Minus (cyan indicator)
- Variables: Get and Set nodes for all your boolean and integer variables
Drag-and-Drop from Variables Panel:
- In the Variables panel (left sidebar), find the variable you want to use
- Drag the variable onto the canvas
- When you release, a menu appears asking if you want to create a Get or Set node
- Select your option and the node is created instantly
Search Tips
The node creation menu search is smart - you can type:
- ">" to find "Greater Than"
- "==" to find "Equal" nodes
- "+" to find "Plus"
- Variable names to quickly find Get/Set nodes
Keyboard Shortcuts
StoryFlow Editor includes standard keyboard shortcuts to speed up your workflow. All shortcuts use Ctrl.
| Shortcut | Action | Notes |
|---|---|---|
Ctrl + S |
Save active file | Works anywhere in the editor |
Ctrl + Z |
Undo last action | Canvas must be focused |
Ctrl + Y |
Redo action | Also: Ctrl + Shift + Z |
Ctrl + C |
Copy selected nodes | Canvas must be focused |
Ctrl + V |
Paste nodes at cursor | Pastes at mouse position |
Delete or Backspace |
Delete selected nodes/edges | Canvas must be focused |
Focus Requirement
Most keyboard shortcuts only work when your mouse cursor is over the canvas. This prevents accidental edits while typing in text fields or the dialogue editor. The Save shortcut (Ctrl + S) works everywhere.
Additional Tips:
- Double-click dialogue nodes to quickly open the Dialogue Editor
- Double-click edges (connection lines) to delete them instantly
- Drag file tabs to reorder your open files
- Click nodes in the minimap to quickly jump to different parts of your story
Next: Learn About Node Types
Now that you understand the interface, explore the Node Types Reference to learn about all 21 node types and how to use them to build complex interactive stories.
Related Topics
→ Node Types→ Connections→ Dialogue Editor→ Quick Start